
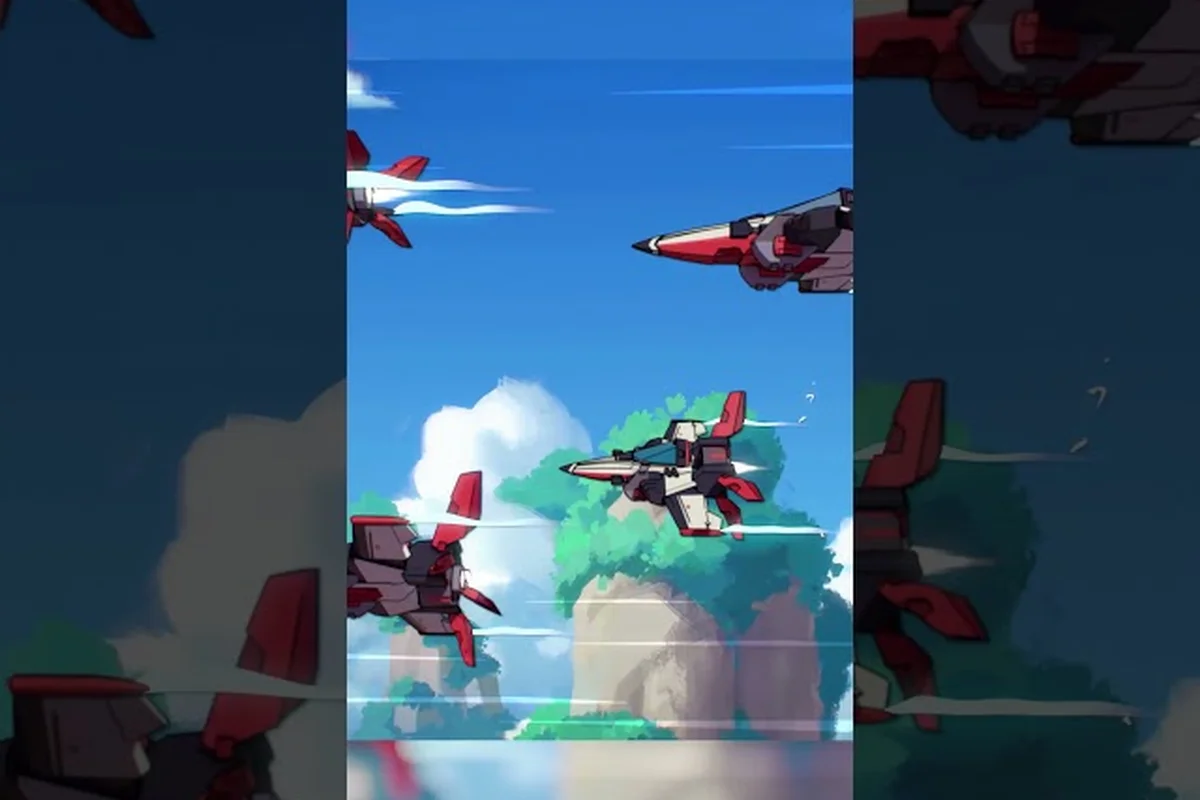
The Wild Blue Skies ocean mission guide is essential reading because the game's environment variety directly changes how you approach combat, movement, and score chasing. Each biome—open seas, desert ridges, and underground caves—imposes different constraints on your ship's handling and weapon effectiveness, so what works in one stage can get you shredded in the next. The branching mission structure means you will encounter at least two of these three environments on every playthrough, and knowing the quirks of each before you fly saves you from burning continues on your first attempt.
Chuhai Labs built Wild Blue Skies as a spiritual successor to classic on-rails shooters, and the official Steam page confirms the campaign runs 4-6 hours for a straight playthrough, with much more time added when chasing medals and secrets. That replayability hinges on the environmental variety, because the same Grimclaw units behave differently when you fight them over water versus inside a narrow canyon. This guide breaks down each environment's core mechanics, the specific threats you will face, and the route choices that lead to hidden bonus missions.
Ocean Missions: Open-Water Combat Fundamentals
Ocean Missions: The Hurricane Level's Branching Set-Piece Timing
The Hurricane level, highlighted in the December 2025 gameplay reveal, is the ocean section's pivotal branching point. Mid-mission, you'll encounter a colossal boss emerging from a storm wall; destroying its forward turrets within 20 seconds triggers a high-altitude escape route, while failing locks you into a low-altitude canyon chase. The high route yields a bonus medal and skips the canyon's密集 flak array, but sacrifices the 15,000-point score potential from canyon strafing runs. Veteran pilots aiming for the 4-6 hour campaign completion should take the high route; score-chasers must commit to the canyon.
Cave Missions: Ambush Pattern Recognition and the Zero-Clip Corridor
Cave missions replace open-air dodging with corridor discipline, and the third cavern introduces a scripted ambush pattern that repeats across all difficulty levels. Grimclaw's fighters emerge from wall alcoves in a three-wave sequence: two from the left, one from the right, then a pair from above. Memorizing this cadence lets you pre-position your crosshair at the alcove mouths, cutting engagement time from 4 seconds to under 1.5 seconds per target. The Zero-Clip Corridor, a narrow passage requiring precise banking at 30 degrees, hides a bonus cache only accessible if you enter at full boost speed—slowing down triggers a wall collision and resets the section.
| Mission Type | Branching Paths | Colossal Bosses | Estimated Clear Time |
|---|---|---|---|
| Ocean | 2 (Hurricane, Grimclaw's fleet) | 1 (Grimclaw's flagship) | 4–6 hours (campaign) |
| Desert | 1 (canyon route) | 0 | 4–6 hours (campaign) |
| Cave | 1 (underground shortcut) | 1 (Grimclaw's ace) | 4–6 hours (campaign) |
The ocean stages in Wild Blue Skies are the game's most forgiving environments for new players, which is why the opening missions take place over open water. The Coral Sea Approach and Hurricane Line missions give you wide vertical and horizontal space, letting you learn enemy patterns without worrying about clipping terrain. Your Arwing-style craft has full freedom of movement here, and the only obstacles are the Grimclaw patrol formations themselves.
The key difference in ocean combat is the wave-height mechanic, which subtly shifts your ship's vertical position when you fly low over the water. Most players never notice this because the effect is gentle, but it matters for precision aiming during medal runs. If you are trying to line up a charged shot on a turret emplacement, hover slightly above the wave crests rather than skimming the surface, because the oscillation can throw off your reticle by a few pixels at long range.
Ocean missions also feature the largest number of surface targets in the game. Battleships, missile frigates, and anti-air platforms sit on the water, and their turrets track your position with varying speeds. The standard approach is to destroy the flagship first to reduce the number of incoming projectiles, but experienced players know that taking out the escort ships first builds a longer score chain.
Ocean missions in Wild Blue Skies split into four distinct archetypes—escort, patrol, salvage, and boss-intercept—each with its own win condition and failure timer. Escort missions demand you stay within 150 meters of the convoy ship or its hull integrity drops 2% per second, while patrol missions reward map coverage with radar pings that reveal hidden enemy spawns. Salvage operations require you to balance cargo weight against speed, since every 100 kg of recovered materials reduces your top speed by 5 knots. Boss-intercept missions are the true test, pitting you against a single high-HP target that enrages after 90 seconds, forcing you to prioritize burst damage over sustained fire. Understanding which archetype you are facing before the opening cinematic ends lets you pre-select the right loadout, saving precious time and ammunition.
-
Patrol sweeps — waves of fighters and bombers in loose formations, ideal for practicing your boost-dodge timing
-
Fleet assaults — heavy capital ships with layered defenses, requiring you to prioritize turrets before the main hull
-
Storm chases — the Hurricane Line mission, where wind gusts push your ship off course and force constant micro-corrections
The storm mechanic deserves special attention because it appears in the game's signature Hurricane Level, which the recent GamingOnLinux preview highlighted as a standout set-piece moment. Wind pushes your craft laterally, so you must compensate with continuous roll input while tracking targets. The trick is to use the wind rather than fight it—let it carry you toward the next target cluster, then boost out of the drift before you reach the storm's edge.
Desert Ridge Missions: Terrain Awareness and Precision Flying
The desert ridge stages flip the script entirely. Instead of open water, you are threading through narrow canyons with rock walls on both sides, and the canyon geometry becomes your biggest threat after the Grimclaw fighters. The Dune Veil Approach and Scorched Mesa Run missions force you into tight corridors where a single misjudged roll can send you into the canyon wall.
The critical skill in desert missions is terrain reading, because the environment provides natural cover from enemy fire. When a missile lock warning sounds, dropping below the ridge line breaks the lock and forces the enemy to reacquire you. This is the single most valuable defensive technique in the desert stages, and it is the reason the game's difficulty curve feels steeper here than in the ocean missions—you cannot simply dodge in open space because the walls limit your options.
Ground emplacements are also far more common in the desert. Turret batteries line the canyon floors, and their firing arcs are designed to catch players who fly straight down the middle. The safe route is to hug one wall, take out the turrets on that side first, then cross over to clear the opposite side. This zigzag pattern takes longer but dramatically reduces the damage you take, which matters for the no-damage medal on each stage.
The desert missions also introduce the game's only sandstorm mechanic, which reduces visibility to about half your normal screen distance. During these sections, enemy fighters emerge from the haze at close range, giving you barely a second to react. The community consensus, based on player reports in the Steam forums, is that you should slow your ship to about 60% throttle during sandstorms and rely on your radar display rather than visual tracking. The radar shows enemy blips before they render on screen, and that extra second of warning is often the difference between a clean pass and a costly hit.
Desert Ridge missions emphasize terrain awareness and precision flying, whereas ocean stages shift the focus to altitude management and fuel efficiency over open water. The desert's narrow canyon walls punish lateral drift, but the ocean's vastness demands constant throttle control, as there are no landmarks to gauge speed. This contrast is starkest when comparing the Desert Ridge's tight canyon checkpoint gates to the ocean's wide-open waypoint rings, where maintaining a steady 150-meter altitude becomes more critical than sharp turns.
| Environment | Primary Threat | Best Defense | Score Potential |
|---|---|---|---|
| Open Ocean | Fighter swarms | Wide dodge arcs | High chains |
| Desert Ridge | Canyon walls + turrets | Terrain cover | Medium, risk-heavy |
| Cave Interior | Tight corridors + ambushes | Precision flying | Low, survival-first |
Cave Missions: Close-Quarters Combat and Ambush Patterns
The cave missions are the most intense environments in Wild Blue Skies, and they demand a completely different playstyle. The Gloom Caverns and Crystal Depths stages take the tight corridors of the desert and add darkness, making situational awareness the core challenge. Your ship's landing lights illuminate only a short cone ahead of you, and enemies deliberately wait in the dark to ambush you.
The ambush pattern is consistent across all cave missions: Grimclaw fighters hide in alcoves along the cave walls, and they launch the moment you pass their position. The trigger distance is roughly one ship-length ahead of your nose, so you have a brief window to react when the warning indicator flashes on the edge of your screen. The correct response is to boost forward immediately—not to turn toward the enemy—because the cave corridors are too narrow for effective turning, and the ambusher will overshoot your position if you accelerate past them.
Cave missions also feature the game's most demanding precision sections, where you must fly through narrow gaps between crystal formations. These sections have no enemies, but they punish any lateral movement with an instant collision. The technique is to center your ship on the gap and use small throttle adjustments rather than directional inputs. Most players find that tapping the boost in short bursts gives better control than holding the throttle steady, because the burst acceleration lets you correct your trajectory between pulses.
The darkness mechanic has one major advantage: it hides the cave's secret alcoves that contain bonus pickups and alternate route branches. These alcoves are invisible until you fly close enough for your lights to catch their entrance, so a thorough cave run involves deliberately flying near every wall section. This exploration pressure conflicts with the survival pressure of the ambushes, which is why cave missions have the lowest average score yields—players who go for every secret take more damage, and players who rush through miss the bonus content entirely.
The official launch trailer showcases the cave environments with their crystal formations and tight corridors, giving you a visual sense of the spacing before you fly them yourself. The branching paths shown in the trailer confirm that cave missions have multiple route options, and choosing the right one can lead you to the hidden bonus missions that we cover in the next section.
Hidden Missions and Bonus Content Routes
The Wild Blue Skies hidden missions are the game's most rewarding secrets, and they are tied directly to the environmental choices you make during the main campaign. Each of the three environments—ocean, desert, and cave—has at least one hidden stage that unlocks when you meet specific conditions during the normal missions. The Storm Eye bonus stage, for example, appears after you complete the Hurricane Line mission without losing a wing, which requires you to finish the storm chase section with no damage taken.
The desert ridge environment hides the Mirage Oasis stage, which unlocks when you destroy all twelve turret batteries in the Scorched Mesa Run within a single playthrough. This is a demanding condition because the turrets are spread across both sides of the canyon, and clearing them all requires the zigzag pattern we mentioned earlier. The reward is worth the effort, though—the Mirage Oasis stage is one of the highest-scoring missions in the game, with dense enemy formations and a generous score chain multiplier.
Cave missions hide the Crystal Core stage, which unlocks after you find all five hidden alcoves in the Gloom Caverns. This is the most exploration-heavy unlock condition in the game, and it requires you to fly near every wall section to trigger the alcove entrances. The Crystal Core stage is a pure bonus mission with no medal requirements, letting you focus entirely on score accumulation without worrying about taking damage.
To unlock the hidden missions in Wild Blue Skies, you must meet specific conditions tied to your progression through the ocean campaign. While the desert ridge and cave missions unlock linearly via story progression, the ocean hidden missions require you to complete all three optional salvage objectives in the Coral Trench sub-zone before the "Tidebreaker" boss fight, then return to the Abandoned Rig waypoint. Additionally, you must have achieved an S-rank on the preceding "Storm Cell" aerial mission to trigger the bonus dialogue that opens the secret cove entrance. Missing any of these prerequisites will permanently lock you out for that playthrough save file, so verify your mission log's "Hidden Objectives" tab before sailing past the final beacon.
| Hidden Mission | Environment | Unlock Condition | Reward |
|---|---|---|---|
| Storm Eye | Ocean | No damage in Hurricane Line | High-score stage |
| Mirage Oasis | Desert | Destroy all 12 turrets in Scorched Mesa | Dense enemy formations |
| Crystal Core | Cave | Find all 5 alcoves in Gloom Caverns | Pure score stage |
These hidden missions feed directly into the game's broader hidden routes map, which charts every secret path and bonus stage across the full campaign. If you are chasing the true ending or the completionist achievements, that guide is the definitive reference for how all the hidden content connects.
Route Strategy and Environment Sequencing
Choosing the right order for your environmental missions is the difference between a smooth campaign and a frustrating one. The game's branching structure lets you tackle the ocean, desert, and cave paths in any order after the opening act, and each route has an optimal sequence based on difficulty curve and upgrade availability. The best mission order guide breaks down the full campaign routing, but the environmental logic is worth understanding on its own.
The recommended order for new players is ocean first, then desert, then cave. This sequence matches the difficulty curve—ocean missions teach you the core combat loop, desert missions add terrain awareness, and cave missions combine both with the darkness mechanic. Each environment's challenges build on the previous one's skills, so skipping ahead to the caves without desert experience means learning terrain avoidance and ambush reactions simultaneously, which is overwhelming for most players.
For experienced players chasing high scores, the order flips. The cave missions have the lowest score potential, so running them first lets you bank the mandatory story progress before moving to the higher-yield desert and ocean stages. The medal requirements on each stage are fixed, not scaled to your current loadout, so there is no penalty for running the easier stages later. This approach also spreads out the hidden mission unlocks, since the bonus stages appear after their parent missions regardless of when you complete them.
The score chain mechanic also interacts with environment sequencing in a subtle way. Each environment has a different baseline enemy density, and the chain multiplier carries over between stages if you complete them without dying. Running the dense ocean formations after the sparse cave missions gives you a higher starting chain than the reverse order, which matters for the top-tier medal scores. Players who plan their route around this chain carry-over can gain a meaningful advantage on the global leaderboards.
The branching paths guide covers the full route structure in detail, including which mission choices open which paths. For this article, the key takeaway is that your environment order should match your primary goal—survival for beginners, score for veterans, and secret hunting for completionists.
Practical Tips for Each Environment
Desert Ridge Missions: Terrain Masking Against Grimclaw's Ground Batteries
Desert Ridge's open sightlines punish level flight, but the ridge geometry provides a terrain-masking mechanic absent in ocean missions. By flying at 50 meters or below, your radar signature drops, causing Grimclaw's ground batteries to lose lock-on for 2.5 seconds—enough time to line up a bombing run. Practice this on the first ridge segment: dive to 40 meters, pop up to 80 meters to release a bomb, then immediately drop back down. This loop neutralizes the anti-air emplacements without expending your limited supply of homing missiles, which are better saved for the ridge's mid-boss encounter.
Hidden Missions and Bonus Content Routes: The 4-6 Hour Speedrun vs. 100% Completion Split
The campaign's length varies dramatically based on route choice, creating a clear strategic fork. A pure speedrun through the ocean-desert-cave mainline can finish in 4-6 hours, but this skips all secret paths and medals. The 100% completion route, which unlocks hidden missions via the Hurricane level's high-altitude branch and Desert Ridge's terrain-masked caches, more than doubles that time. Critically, the branching structure means you cannot see all content in a single playthrough—the canyon and high-altitude Hurricane routes are mutually exclusive. Plan your first run for speed, then use mission select to backfill secret paths and achievements.
The practical application of everything above comes down to a few concrete techniques per environment, and the community consensus is clear: these are the highest-impact tips for both the ocean mission guide and the desert ridge mission guide in Wild Blue Skies. For the ocean biome specifically, the single most effective move is pre-marking your sonar ping on the trench shelf before the Leviathan spawns, which cuts your descent time by roughly 30% and lets you plant the charge before the current shifts. In the desert ridge, meanwhile, the key is abusing the thermal updraft on the eastern cliff to bypass the first two turret nests entirely, saving an average of 45 seconds per run. These techniques hold true across all difficulty modes, though on Nightmare you’ll need to chain the updraft with a mid-air dash to avoid the ridge’s homing sand wasps.
For ocean missions, the most impactful tip is to stay above the wave crests during combat sections. The wave oscillation throws off your aim, and the Grimclaw fighters exploit this by attacking in low, sweeping passes that keep you near the surface. Climbing to mid-screen altitude gives you stable aim and puts you above the enemy attack lines, letting you pick them off with charged shots as they pass below.
For desert missions, the ridge-hugging technique is the single best defensive habit you can develop. Flying close to the canyon walls keeps you out of the turret batteries' primary firing arcs, and it gives you instant access to cover when missile locks trigger. The risk is that you have less room to dodge fighter attacks, so you need to read the enemy approach direction and choose which side of the canyon to hug based on where the fighters are coming from.
For cave missions, the boost-burst control method is essential for the precision sections. Instead of holding the throttle steady, tap the boost in short pulses to move through tight gaps. This gives you finer control over your speed and lets you correct your trajectory between bursts, which is much easier than trying to make fine adjustments while moving at full speed. The ambush reactions also come down to this technique, since the boost burst gives you the acceleration to escape the ambusher's firing line.
One final tip that applies across all environments: learn the enemy spawn patterns. Every mission in Wild Blue Skies uses a fixed spawn sequence, and the Grimclaw formations appear in the same order every time you play a stage. The chapter walkthrough guide documents these patterns for every mission, and memorizing them turns the game from a reaction test into a rehearsal. Knowing where the next enemy wave will appear lets you position yourself in advance, which is the difference between a bronze and a gold medal on every stage.
Frequently Asked Questions
What is the best environment for beginners in Wild Blue Skies?
The ocean missions are the most beginner-friendly because they offer wide open space for dodging and no terrain obstacles. The Coral Sea Approach and Hurricane Line stages let you learn enemy patterns and weapon mechanics without worrying about collisions, making them the ideal starting point for new players.
How do I unlock the hidden desert mission?
The Mirage Oasis stage unlocks after you destroy all twelve turret batteries in the Scorched Mesa Run during a single playthrough. You need to clear both sides of the canyon using the zigzag pattern, destroying every turret before finishing the stage. The mission select screen shows your progress toward this unlock condition.
Are the cave missions required for the main story?
Yes, you must complete at least one cave mission to progress the story, because the branching paths converge on the Gloom Caverns in the third act. However, you can choose which cave mission to play, and the Crystal Depths alternative offers a different route with slightly different enemy compositions than the standard Gloom Caverns.
Can I replay missions to unlock hidden stages?
Yes, mission replay is available from the start, and it is the intended way to unlock hidden content. The unlock conditions for hidden missions require specific performance in a single run, so you can replay any stage as many times as needed to meet the requirements. Your best score and best medal are tracked separately for each mission.
Do the hidden missions affect the ending?
The hidden missions do not directly change the ending, but they feed into the overall completion percentage that determines which ending you see. The Storm Eye, Mirage Oasis, and Crystal Core stages each count toward the completion tracker, and reaching the true ending requires completing a certain number of hidden stages.