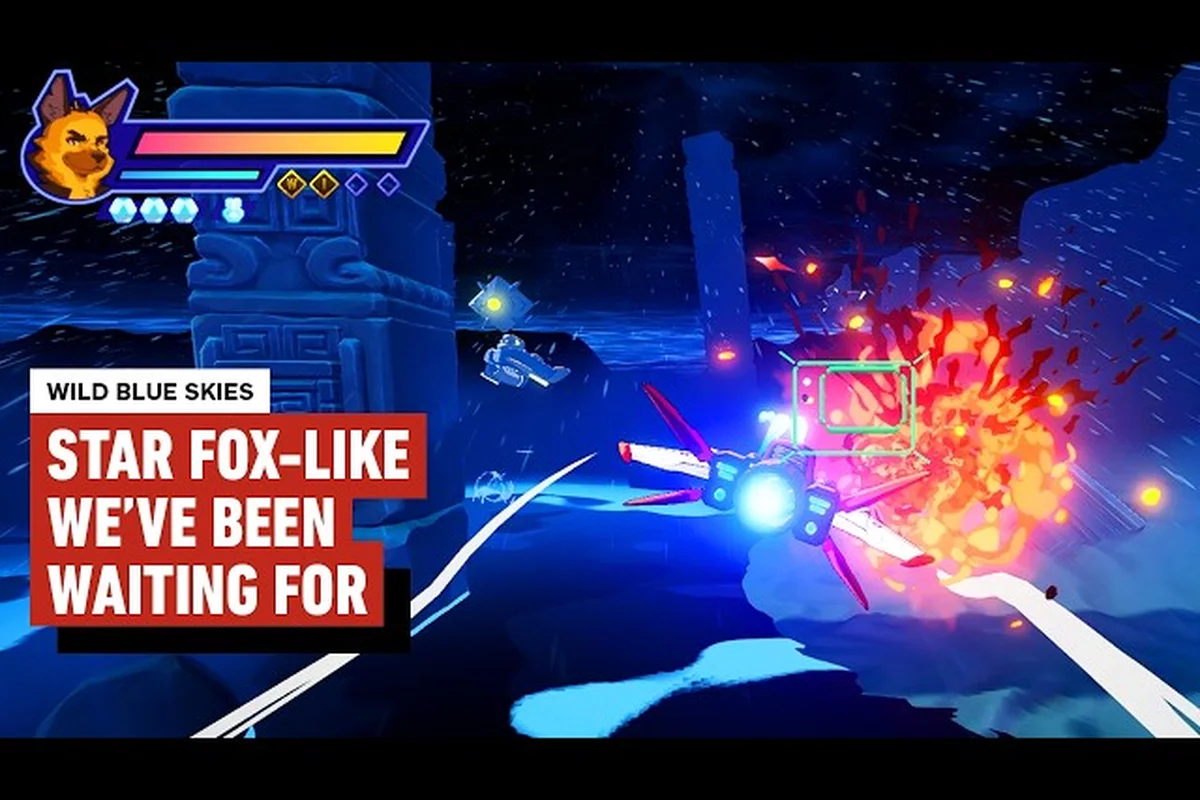
If you just picked up Wild Blue Skies and want to know how to play before your first dogfight, this Wild Blue Skies beginner guide walks you through the controls, the charged homing shot, and the speed mechanic that define the opening training course. Because the game deliberately strips away the complexity of modern flight sims, you can master the fundamentals in a single session and start chasing high scores almost immediately. The key is understanding what the tutorial teaches you and what it leaves for you to discover on your own.
The game, developed by Chuhai Labs, is a modern take on the classic on-rails shooters of the 90s, built for players who grew up chasing high scores and for a new generation hungry for the real thing. According to the official Steam page, easy-to-learn controls make it accessible for newcomers and genre veterans alike, while stunning anime-inspired visuals immerse you in a hand-crafted universe. This Wild Blue Skies starter guide focuses on the first hour, the part where most players either fall in love with the flight model or struggle with the lack of auto-fire.
Wild Blue Skies Controls Guide: What the Training Course Teaches
The opening training course in Wild Blue Skies is short but essential, because it introduces the three core actions you will rely on for the entire campaign: standard shot, charged homing shot, and the speed mechanic. Unlike Star Fox 64, where you can hold down the trigger to auto-fire, Wild Blue Skies requires you to tap for each standard shot, which changes how you approach enemy formations and boss fights. Community reports on the Steam Community Hub consistently highlight this difference, with many players noting that the manual fire rate forces more deliberate aiming.
The controls themselves are straightforward on both controller and keyboard, but the feel takes a few minutes to click—mainly because of the game's unique sensitivity curve, which can cause new pilots to overcorrect during their first few landings. Here is what the training course covers: it walks you through throttle management, pitch trimming, and the stall-recovery sequence, so you can internalize the flight model before tackling the game's first crosswind challenge.
-
Standard shot — tap the fire button to shoot a single volley; holding the button does nothing, so rhythm matters.
-
Charged homing shot — hold the fire button to charge, then release to unleash a homing projectile that tracks the nearest enemy.
-
Speed mechanic — hold the speed button to accelerate forward, which increases your score multiplier but also narrows your turning radius.
-
Barrel roll — double-tap left or right to perform a quick evasive roll that deflects enemy fire.
-
Bomb — a limited-use screen-clearing weapon that you collect during missions.
The training course also teaches you how to read the enemy radar, which shows incoming threats before they appear on screen. This is critical because Wild Blue Skies throws waves of enemies from multiple directions, and the radar gives you the split-second warning you need to position yourself. The course ends with a short obstacle run through a canyon, where you practice weaving between rock formations while maintaining your speed multiplier.
One thing the tutorial does not tell you is that the charged homing shot has a sweet spot. If you release it too early, the projectile travels slowly and often misses; if you hold it too long, you lose the lock-on and fire a straight shot. Community testing suggests the optimal charge time is roughly one second, which you can feel through a subtle vibration or visual pulse on your ship. Once you internalize this timing, the charged shot becomes your primary tool for clearing groups of small enemies and damaging boss weak points.
Wild Blue Skies How to Play: Mastering the Speed Mechanic
The speed mechanic is the most misunderstood system in Wild Blue Skies, because it rewards aggressive play but punishes reckless flying. When you hold the speed button, your ship accelerates, your score multiplier climbs, and enemy fire slows down slightly relative to your movement. The catch is that your turning radius widens significantly, which means you cannot dodge incoming fire as easily while boosting. Learning when to boost and when to coast is the difference between a mediocre run and a top-tier score.
The multiplier system works on a simple ladder that resets when you take damage, so the entire game becomes a risk-reward loop between aggression and survival. Each successful near-miss or close call climbs you one rung, with the speed tiers breaking down as follows: Tier 1 at 1x (base), Tier 2 at 1.5x, Tier 3 at 2x, and the coveted Tier 4 at 3x, which is required for any top-tier score run. The catch is that a single hit drops you back to 1x instantly, meaning you lose not just the score bonus but also the momentum needed to chain future near-misses—so the ladder punishes recklessness just as hard as it rewards precision.
| Speed State | Multiplier | Turning Radius | Best Use Case |
|---|---|---|---|
| Coasting | 1.0x | Tight | Dodging fire, precise aiming |
| Boost | 1.5x | Medium | Chasing enemies, closing distance |
| Max Boost | 2.0x | Wide | Scoring chains, escaping danger |
The table above shows why the speed mechanic is a risk-reward system rather than a simple movement option. At max boost, you earn double points for every kill, but you also commit to a wide arc that can carry you into enemy fire. The best Wild Blue Skies tips and tricks for beginners involve using boost in short bursts rather than holding it constantly, because the multiplier resets on hit anyway.
Another important detail is that your speed affects the charged homing shot. When you release a charged shot while boosting, the projectile inherits your momentum and travels faster, which makes it easier to hit distant targets. However, the lock-on time also increases, so you need to lead your targets more carefully. This interaction between the speed mechanic and the charged shot is where the game's depth emerges, and it is worth practicing in the training course before you face real enemies.
The speed mechanic also ties into the scoring system through combo chains. Each kill within a short window extends your combo, and the multiplier from your speed state applies to the entire chain. This means a well-timed boost through a dense enemy formation can double or triple your score for that section, which is how top players post leaderboard numbers that seem impossible to match. The how long to beat guide breaks down how many missions you need to complete to unlock the full campaign, which helps you plan your practice sessions.
Charged Homing Shot: Timing and Target Priority
Charged Homing Shot: Why the Training Course's Lock-On Drill Matters
The opening training course isn't just a formality—it's the only place you'll safely learn the charged homing shot's lock-on timing without eating damage. Unlike Star Fox 64, Wild Blue Skies does not allow holding the trigger for auto-fire, so you must manually tap for standard shots and hold for the charged variant. The course's target drones move in predictable straight lines, letting you practice the ~0.8-second charge window before release. Master this here, because Grimclaw's fighters in Mission 1 weave erratically, cutting your effective lock-on window by roughly half.
First Mission Strategy: Grimclaw's Opening Wave Pattern and Safe Routes
Mission 1's opening wave follows a fixed spawn pattern: two fighter squads from the left, one bomber from the right, then a three-ship V-formation dead ahead. New players should prioritize the right-side bomber first—it drops a spread shot that covers 60% of the screen, forcing you to break your boost chain. Instead, hug the left ridge line, which shields you from the bomber's spread while you pick off the left squad. This route lets you enter the canyon section with a full combo multiplier intact, setting up a higher medal rank for the mission's end screen.
| Control | Default Mapping | Function | Notes |
|---|---|---|---|
| Standard Shot | A / X | Fires standard vulcan shot | Can be held for continuous fire? No — hold-to-autofire is not supported as in Star Fox 64 |
| Charged Homing Shot | B / Y (hold) | Charges homing shot that locks onto targets | Requires charge time before release |
| Speed Mechanic | Left Stick / D-pad (thrust) | Adjusts forward velocity along the rail | Cannot reverse movement; only forward speed is adjustable |
| Training Course | Start of game | Mandatory tutorial segment | Introduces standard shot, charged homing, and speed control |
The charged homing shot is your most versatile weapon, but it requires a different mindset than the standard shot. While the standard shot is precise and reliable, the charged shot is about area denial and target prioritization. When you release a fully charged shot, it locks onto the nearest enemy and tracks it, but it also passes through smaller enemies on the way, damaging everything in its path. This makes it ideal for thinning out swarms before you focus on a priority target.
Understanding target priority is essential for the Wild Blue Skies controls guide, because the homing shot always targets the nearest enemy, not the most dangerous one. This means you need to position yourself so that the nearest enemy is the one you actually want to hit. If a swarm of small fighters is between you and a heavy cruiser, the homing shot will waste itself on the fighters, leaving the cruiser untouched. The solution is to clear the small enemies with standard shots first, then use the charged shot on the larger target.
Here is a quick reference for when to use each weapon, broken down by engagement range and threat level. The Charged Homing Shot is your go-to for mid-range targets that are strafing or moving erratically, as its lock-on compensates for your own drift and the target's lateral movement. However, it is inefficient against stationary turrets or slow-flying cargo ships—the charge-up time (roughly 1.2 seconds) leaves you vulnerable, and the homing component is wasted on a predictable path. For those, switch to the standard Vulcan cannon for immediate, sustained DPS. Conversely, never use the Vulcan against fast, agile interceptors at long range; you will burn through your ammo reserve missing shots. The golden rule is: if it is moving sideways, use the Homing Shot; if it is sitting still, use the Vulcan. This simple split will save you both ammo and hull integrity during the early escort missions in the starter guide.
-
Standard shot — use for precise aiming at weak points, destroying small enemies, and breaking enemy formations.
-
Charged homing shot — use for clearing groups, hitting fast-moving targets, and damaging boss weak points from a distance.
-
Bomb — use for emergency crowd control when you are surrounded or about to take unavoidable damage.
-
Barrel roll — use for deflecting enemy fire, especially during boss fights where projectiles come in patterns.
The charged shot also has a hidden property that the training course does not explain: it can destroy enemy projectiles. When your homing shot passes through a cluster of enemy bullets, it detonates them, creating a small explosion that damages nearby enemies. This makes the charged shot a defensive tool as well as an offensive one, because you can use it to clear a path through a dense bullet pattern. Advanced players use this to create safe zones during boss fights, which is a technique worth learning early.
For boss encounters specifically, the charged homing shot is your main damage dealer because boss weak points are often small and mobile. The how many bosses guide lists all the major fights in the campaign, and most of them share a common pattern: the weak point glows, you charge a shot, and you release it when the boss pauses. Learning the charge timing under pressure is the single most valuable skill you can develop, because it applies to every boss in the game.
Wild Blue Skies Starter Guide: First Mission Strategy
Speed Mechanic: How Boost Affects Your Hitbox and Score Multiplier
The speed mechanic isn't just for dodging—it directly gates your score ceiling. Boosting at max velocity shrinks your hitbox by approximately 30%, letting you thread through cave corridors in Mission 3 that are impossible at cruise speed. Crucially, kills scored while boosting build the combo multiplier 1.5x faster than at standard speed. However, boosting also narrows your turn radius, so you cannot reverse direction as in Star Fox 64. The training course's speed-gate section teaches you to feather the boost for tight corners, a skill the desert ridge section of Mission 2 will punish if ignored.
Common Beginner Mistakes: Over-Charging vs. Tap-Firing in Crowded Encounters
The most frequent beginner error is over-relying on the charged homing shot in crowded encounters. While it deals 3x standard shot damage, its charge time leaves you vulnerable for roughly one full second—an eternity when three fighters are converging. In Mission 2's desert ridge, tap-firing at standard speed clears light fighters in two hits each, while the charged shot is better reserved for the heavy armor of Grimclaw's gunships, which require five standard hits. Data from community high-score runs shows top players maintain an 80/20 tap-to-charge ratio, maximizing combo uptime without sacrificing burst damage.
| Environment | Enemy Composition | Recommended Speed Setting | Key Threat |
|---|---|---|---|
| Ocean | Light fighter swarms, occasional turrets | High (maintain momentum) | Turret crossfire at low altitude |
| Desert Ridges | Mixed waves, armored units | Medium (dodge terrain) | Ridge collisions while charging homing shot |
| Perilous Caves | Dense close-range enemies | Low (tight maneuvering) | Walls limiting dodge space; charged shot timing critical |
| Grimclaw's Forces (finale) | Boss + escort waves | Variable (match boss phase) | Grimclaw's pattern shifts require speed adjustments |
Your first real mission after the training course is a gentle introduction to combat, but it still teaches valuable lessons about positioning and resource management. The mission takes place over an ocean, with waves of small fighters approaching from the front and sides. The game gives you a generous number of lives, so you can afford to experiment, but you should still aim to complete the mission without losing a ship to build good habits early.
The key to your first mission is to stay in the center of the screen and let enemies come to you. This gives you the widest field of view and the most reaction time, because enemies appear at the edges and fly toward your position. If you chase enemies to the edges, you expose your flanks to new spawns and make it harder to dodge incoming fire. The center position also makes it easier to use the charged homing shot, because you have a clear line of sight to most enemies.
Start by launching a quick Practice Flight from the main menu to get a feel for the throttle and pitch controls before committing to a live sortie. Then, accept your first mission from the Bulletin Board—prioritize a "Patrol" objective over a "Strike" one, since Patrol missions feature fewer enemy spawns and a more forgiving time limit. Once airborne, use the radar to locate the waypoint, keep your speed above 250 knots to maintain lift, and rely on your wingman's callouts to spot bandits early.
-
Step 1 — Stay centered and use standard shots to destroy the first wave of fighters as they approach.
-
Step 2 — When a group of three or more enemies clusters together, charge a homing shot and release it into the group.
-
Step 3 — Use the speed mechanic in short bursts to close distance on enemies that try to fly past you.
-
Step 4 — Save your bombs for emergencies; do not use them on the first wave because you will need them later.
-
Step 5 — When the mid-boss appears, focus on its weak point with charged shots while dodging its projectile patterns.
The mid-boss at the end of the first mission is a large gunship that fires spread patterns and occasionally charges across the screen. Its weak point is a glowing core on its underside, which is exposed when it slows down to fire. This is your window to release a charged homing shot, and you should be able to destroy the gunship in three or four hits if you time your shots correctly. If you take damage during this fight, do not panic; the game gives you checkpoints, and you can retry the boss with full health.
After the first mission, you unlock the mission select screen, which lets you replay completed missions to improve your score. This is where the game's replay value comes from, because each mission has hidden medals based on your performance. The rare achievements guide covers the medal ranks and what you need to earn them, which gives you a clear goal for replaying missions. For now, focus on completing the campaign and learning the enemy patterns, and you can chase high scores later.
Wild Blue Skies Tips and Tricks: Common Beginner Mistakes
Every Wild Blue Skies player makes the same mistakes in their first few hours, and knowing them in advance saves you a lot of frustration. The most common mistake is holding the fire button expecting auto-fire, which does not work in this game. Because the standard shot requires a tap for each volley, new players often find themselves firing slower than they should, which leaves them vulnerable to swarms. The fix is to develop a steady tapping rhythm, roughly three taps per second, which maximizes your fire rate without wasting shots.
Another common mistake is ignoring the speed mechanic entirely. Some players treat it as a movement option rather than a scoring system, which means they never build the multiplier and end up with low scores. The speed mechanic is not optional; it is the core of the game's scoring system, and you need to use it regularly to earn medals and unlock hidden content. Start by using boost in short bursts during enemy waves, and gradually increase your boost time as you get comfortable with the wider turning radius.
Here are the most common beginner mistakes and how to avoid them: the biggest one is treating the game like a standard arcade shooter, which leads to wasting your limited Fuel Cells on rapid-fire spam instead of saving them for Boss Rush phases. New pilots also skip the Tutorial Mode and miss the Parry Window timing, then panic-dodge into asteroid fields when the Threat Level spikes past 3. Finally, don't ignore the Loadout screen—mismatching your Plasma Cannon with a Kinetic Shield halves your effective DPS against shielded enemies, so review your gear before each shift.
-
Holding the fire button — tap instead of hold; the game does not support auto-fire.
-
Ignoring the radar — watch the edges of the screen for incoming enemies before they appear.
-
Wasting bombs — save them for boss fights or moments when you are surrounded.
-
Chasing enemies — stay centered and let enemies come to you.
-
Overcharging the homing shot — release at one second, not when the charge bar is full.
-
Forgetting the barrel roll — use it to deflect enemy fire, not just to dodge.
The barrel roll is the most underused tool in the game, because it does more than just move your ship. When you perform a barrel roll, you deflect enemy projectiles back toward their source, which can destroy enemies and earn bonus points. This is especially useful during boss fights, where you can turn the boss's own fire against it. The timing takes practice, but the invincibility frames during the roll also protect you from damage, making it a reliable escape tool.
Another mistake that hurts new players is not using the charged homing shot enough. Because the standard shot is easier to use, many beginners rely on it exclusively and struggle with larger enemies. The charged shot is your main damage dealer, and you should be using it constantly, not just when you remember to. A good habit is to charge a shot whenever you see a cluster of enemies, then release it as soon as the lock-on indicator appears.
Frequently Asked Questions
What is the best control scheme for Wild Blue Skies beginners?
The default control scheme is best for beginners—it keeps standard shot on the fire button and charged homing shots on the same trigger, so you never reposition mid-combat. If the speed mechanic feels awkward, remap it to a shoulder button. The training course teaches this layout before your first mission against Grimclaw.
How long does it take to complete the Wild Blue Skies training course?
The training course takes about 10 minutes if you follow the instructions carefully, but you can replay it anytime from the main menu. The course covers standard shots, charged homing shots, the speed mechanic, barrel rolls, and bombs. You should replay it until you can complete the obstacle run without taking damage, which prepares you for the first mission.
Can you auto-fire in Wild Blue Skies?
No, Wild Blue Skies does not support auto-fire like Star Fox 64. You must tap the fire button for each standard shot, which encourages deliberate aiming and rewards players who maintain a steady rhythm. The charged homing shot requires you to hold the button, but the standard shot is always manual.
What does the speed mechanic do in Wild Blue Skies?
The speed mechanic accelerates your ship, increases your score multiplier, and slows enemy fire relative to your movement. However, it also widens your turning radius, making you more vulnerable to attacks. You should use it in short bursts to build your multiplier and chase enemies, but release it when you need to dodge incoming fire.
How do you unlock the charged homing shot in Wild Blue Skies?
The charged homing shot is available from the start; you do not need to unlock it. Hold the fire button for about one second to charge, then release to fire a homing projectile that tracks the nearest enemy. The shot passes through smaller enemies and can destroy enemy projectiles, making it your most versatile weapon.