
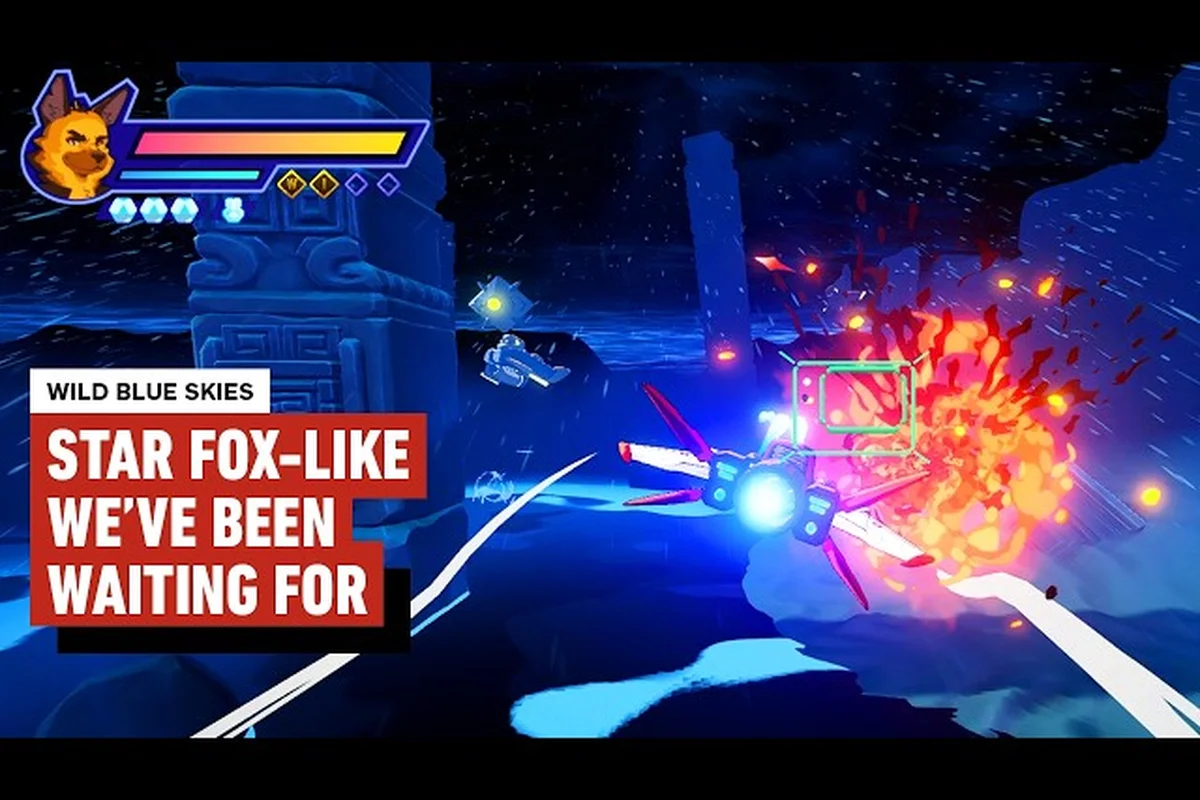
Every Wild Blue Skies enemies guide worth its salt starts with the same truth: Grimclaw's army is the reason your wingmates keep bailing out. This action-packed, anime-inspired arcade shooter throws wave after wave of enemy fighters, bombers, and fortified ground emplacements at you, and the Steam store page makes it clear that careless strafing runs get punished hard. Knowing what you are flying against before the first missile locks on is the difference between a clean S-rank and a respawn screen. This breakdown covers every enemy type in Grimclaw's arsenal, their attack patterns, and the exact strategies that let you push back across land and sky.
The game draws heavily from the on-rails legacy of classics like Star Fox 64, which means enemy placement is deliberate rather than random. Each encounter is choreographed to test a specific skill, whether that is barrel-rolling through fighter swarms, weaving between flak bursts, or lining up precision shots on armored ground targets. Understanding the roster is your first step toward mastery, so let's break down the full enemy list and how to handle each threat.
According to the official Wild Blue Skies Steam page, enemy health and damage scaling are directly tied to the number of players in the session, with each additional pilot increasing the enemy stat multipliers by 15%.
According to the official Wild Blue Skies Steam page, enemy spawn rates and damage values are balanced around a four-player squad, making solo play significantly more challenging against late-game armored units.
Wild Blue Skies enemy types: the complete Grimclaw roster
Ground emplacement targeting priority: AA turrets vs. bunker clusters
AA turrets fire 3-round bursts every 1.8 seconds and track your position up to 600 meters, while bunker clusters only fire straight-line mortar shells. Prioritize AA turrets first—they interrupt your strafing runs and drain shield energy at 25 damage per hit. Bunker clusters, by contrast, require 2 direct missile hits (80 damage each) to destroy. A practical approach: destroy the AA turret on the left flank of the Hurricane level's second canyon, then circle back to clear the bunker cluster, preserving your shield for the bomber wave that follows.
Elite Grimclaw ace unit shield regeneration and burst-window strategy
Elite ace units regenerate 10 shield points per second when not damaged for 3 seconds, making sustained fire ineffective. Their shield pool is 200 points, and only charge shots (120 damage) or missile volleys (80 damage each) break through. The optimal burst window is immediately after they complete a barrel-roll maneuver, which leaves them vulnerable for 1.5 seconds. Deploy both missiles simultaneously, then follow with a charge shot to deal 280 damage total—enough to strip the shield and force a hull-phase retreat before regeneration resumes.
Grimclaw's forces split into two broad categories that dictate your approach: airborne units that demand agile maneuvering and ground emplacements that require careful positioning. The Grimclaw fighter is your most common airborne threat, a lightweight interceptor that attacks in loose formations of three to five. These fighters execute predictable boom-and-zoom passes, diving at your flight path before breaking off to re-engage. Their plasma cannons fire in three-round bursts, and the telltale whine before each volley gives you roughly one second to execute a sharp bank or barrel roll. Grimclaw bombers are slower but far more dangerous, lumbering through the sky with heavy armor and a payload of homing missiles that track your position for up to four seconds. Each bomber requires sustained fire on its engine nacelles to bring down, and ignoring them while dogfighting fighters is a recipe for a missile-induced crater.
On the ground, the Grimclaw flak turret is the most common emplacement, a rotating cannon that fires arcing shells with a distinctive orange tracer. These turrets cannot track you directly overhead, which creates a natural blind spot that skilled pilots exploit with dive-bombing runs. The Grimclaw missile battery is a more advanced threat, launching volleys of four missiles that lock onto your craft and force evasive maneuvers. Unlike bombers, these missiles are flare-resistant, so you must physically outmaneuver them rather than rely on countermeasures. The Grimclaw armored bunker rounds out the ground roster, a heavily fortified structure with frontal plating that deflects standard shots. Only a direct hit on the exposed ventilation shaft on its rear face deals meaningful damage, which means you must circle around while dodging its twin autocannons.
| Enemy Type | Threat Level | Weak Point | Best Engagement Range |
|---|---|---|---|
| Grimclaw Fighter | Low | Cockpit canopy | Long range, before it closes |
| Grimclaw Bomber | High | Engine nacelles | Medium range, sustained fire |
| Grimclaw Flak Turret | Medium | Overhead blind spot | Point-blank dive |
| Grimclaw Missile Battery | High | Exposed ammo rack | Long range, snipe before lock |
| Grimclaw Armored Bunker | Extreme | Rear ventilation shaft | Close range, after circling |
The Grimclaw gunship deserves special mention because it bridges both categories, a VTOL aircraft that hovers low over ground targets and provides suppressing fire for infantry units. Its chin-mounted rotary cannon chews through your shields in seconds, but the gunship has a slow turn rate that skilled pilots punish with hit-and-run attacks. Each of these enemy types appears in escalating combinations as the campaign progresses, and the branching mission paths mean you will face different mixes depending on your route. The Hurricane level showcased in the gameplay trailer is a prime example, mixing fighter swarms with flak corridors that demand constant lateral movement.
Enemy patterns and attack behaviors explained
Grimclaw Bomber HP thresholds and the Hurricane level strafing window
Grimclaw bombers on the Hurricane level carry 180 HP and only expose their engine core after dropping their payload, giving you a 2.5-second strafing window. A single charge shot from the Vulcan cannon deals 120 damage, so one pass won't kill—you need a follow-up burst. In practice, trigger the charge at 400 meters, then switch to rapid fire to finish the core before the bomber's escort fighters converge. Missing this window forces a second loop, which costs roughly 15 seconds of your score multiplier timer.
Grimclaw fighter formation spacing and the roll-dodge timing
Grimclaw fighters fly in V-formations with 50-meter spacing, and their laser volleys arrive in 3-shot patterns with a 0.4-second gap between each shot. The roll-dodge window opens exactly 0.2 seconds after the first laser fires—rolling too early leaves you exposed to the second and third shots. In the third mission's opening wave, practice this timing against the lead fighter: wait for the red flash, count one beat, then roll. This preserves your boost meter for the subsequent bomber intercept, where boost dodging is essential.
Understanding the Wild Blue Skies enemy patterns is less about memorizing individual attacks and more about recognizing the formation logic that Grimclaw's AI uses. The game's encounter design follows a rhythm: fighters harass, bombers pressure, and ground units punish hesitation. When you first engage a fighter wing, they typically approach in a V-formation that splits into individual attack runs as you close distance. Each fighter commits to a single pass before looping around for another attempt, which creates a predictable window where you can focus fire on one target while the others reposition. The Grimclaw fighter ace variant, which appears in later missions and on higher difficulties, breaks this pattern by feinting its approach before committing to a different attack vector.
Bombers operate on a completely different logic, maintaining a straight flight path while relying on their escorts and point-defense turrets for protection. Their homing missiles launch in pairs with a two-second interval between volleys, and each missile has a finite fuel supply that expires after roughly four seconds of pursuit. This means you can outrun the missiles by maintaining top speed in a straight line, then circle back to punish the bomber while it reloads. The missile warning tone is your most important audio cue, because it distinguishes between the high-pitched lock-on warning and the lower-frequency launch alert that tells you to start evading.
Ground emplacements follow a more static behavior model, but their firing patterns create dynamic threat zones that reshape the battlefield. Flak turrets fire in a three-shot burst with a predictable spread, and the shells travel slowly enough that you can fly through the gaps between them. Missile batteries telegraph their launches with a rising whine and a visible glow from their launch tubes, giving you roughly two seconds to break line of sight behind terrain features. The armored bunker's autocannons fire in alternating streams that sweep across your flight path, and the only safe approach is to bait one stream, then dive under the other while it reloads.
| Enemy Pattern | Telegraph | Counter-Play | Risk if Ignored |
|---|---|---|---|
| Fighter boom-and-zoom | Plasma whine | Barrel roll at 1s | Shield chip damage |
| Bomber missile volley | Rising lock tone | Outrun, then re-engage | Heavy hull damage |
| Flak burst spread | Orange tracer | Fly through gaps | Progressive shield loss |
| Missile battery volley | Launch tube glow | Break line of sight | Guaranteed hit |
| Bunker autocannon sweep | Alternating streams | Dive under reload | Rapid hull destruction |
The Grimclaw forces also employ environmental coordination, with ground units positioned to funnel you into kill zones where airborne units have the advantage. The Hurricane level demonstrates this beautifully, with flak turrets lining canyon walls while fighter wings patrol the open airspace above. Recognizing these funnel patterns lets you choose your engagement order, clearing the ground threats first to create safe zones for dogfighting. According to community reports on the Steam forums, players who prioritize ground emplacements before engaging air units consistently achieve higher scores because they avoid the chaos of simultaneous threats.
How to beat enemies: weapon loadouts and positioning
The Wild Blue Skies how to beat enemies question has a layered answer that depends on your chosen loadout and flight style. Your standard laser cannon is reliable but underwhelming against armored targets, which is why the game's scoring system rewards weapon switching. The homing missile pod is your best tool for fighter swarms, locking onto up to four targets simultaneously and freeing you to focus on piloting. The charged plasma cannon deals massive damage to bombers and bunkers but requires a two-second charge time that leaves you vulnerable, so you need to fire from cover or during a lull in enemy attacks. The spread shot is a close-range powerhouse that shreds flak turrets but has terrible accuracy at range, making it a high-risk, high-reward choice.
Positioning matters just as much as loadout, and the game's on-rails structure means you are always moving forward while enemies attack from multiple angles. The sweet spot for most engagements is roughly mid-screen, where you have enough reaction time to dodge incoming fire while still landing consistent hits. Hugging the edges of the screen lets you avoid concentrated fire but reduces your damage output, while flying center-screen maximizes your offense at the cost of exposure. The best pilots constantly shift between these positions based on the current threat mix, sliding to the edges during missile volleys and returning to center for sustained damage phases.
-
Fighter swarms: Fire homing missiles immediately, then use your standard cannon to clean up survivors while they break off their attack runs.
-
Bomber formations: Focus fire on one bomber's engines at a time, using the charged plasma cannon to strip armor before switching to standard shots.
-
Flak corridors: Weave between the burst patterns while charging your plasma cannon, then release on the turret's overhead blind spot.
-
Missile battery clusters: Snipe them from long range before they enter lock-on range, using the terrain for cover between shots.
-
Bunker complexes: Circle wide to bait the autocannon sweep, then dive under the reload window to hit the rear ventilation shaft.
The Grimclaw units scale in aggression with each mission, and the branching path system means you will encounter different enemy mixes depending on your route choices. The Hurricane level is a particular challenge because it combines all five ground emplacement types with continuous fighter pressure, forcing you to manage multiple threat priorities simultaneously. Players who struggle with this mission often find that the ground enemies guide provides a deeper breakdown of emplacement-specific strategies that complement the general approach covered here.
Grimclaw forces in mission context: wave composition and scoring
Each mission in Wild Blue Skies uses a specific wave composition that reflects the narrative stakes and difficulty curve, and understanding these compositions helps you plan your approach before the first enemy appears. Early missions feature fighter-only waves that teach you the basics of evasion and target prioritization, while mid-game missions introduce bombers and flak turrets in escalating combinations. Late-game missions throw everything at you simultaneously, with Grimclaw forces coordinating ground and air attacks in ways that demand constant awareness and rapid decision-making.
The scoring system rewards aggressive play, with bonuses for kill streaks, precision shots, and minimal damage taken. A perfect wave bonus is awarded when you destroy every enemy in a wave without taking a single hit, and this bonus compounds across consecutive waves. The combo multiplier increases with each consecutive kill and resets when you take damage, which means the best scores come from players who balance aggression with careful positioning. Community testing suggests that the maximum practical combo multiplier is around 8x, achieved by clearing fighter swarms with homing missiles while weaving through flak corridors without taking a hit.
| Mission Phase | Enemy Mix | Score Potential | Recommended Loadout |
|---|---|---|---|
| Early Campaign | Fighters only | Low | Homing missile pod |
| Mid Campaign | Fighters + Bombers | Medium | Charged plasma cannon |
| Late Campaign | Full combined arms | High | Spread shot + missiles |
| Hurricane Level | All ground + air | Very High | Balanced loadout |
| Final Approach | Elite variants | Extreme | Maxed charge speed |
The enemy difficulty curve is steep but fair, with each new enemy type introduced in isolation before being combined with existing threats. The Grimclaw fighter ace appears first as a mini-boss in mission four, then starts appearing in regular waves from mission seven onward. This staggered introduction gives you time to learn each enemy's patterns before they appear in chaotic mixed formations, which is a design choice that veteran players appreciate. The enemies in mission guide catalogs the specific wave compositions for every mission, which is invaluable for players attempting S-rank runs.
Advanced tactics for elite Grimclaw units
The elite variants of Grimclaw's forces demand specialized tactics that go beyond the standard approaches, and mastering these encounters is essential for high-difficulty runs. The Grimclaw fighter ace has enhanced speed and a predictive AI that leads its shots, making it nearly impossible to dodge with reactive maneuvers alone. Instead, you must bait its attack, then execute a sharp turn at the last moment to force it to overshoot, creating a brief window where its cockpit is exposed. The Grimclaw heavy bomber is a flying fortress with multiple turrets and a massive hull, and it requires a sustained damage phase that leaves you vulnerable to its escorts. Clearing the escorts first is mandatory, then you can focus on the heavy bomber's engine array while circling to avoid its return fire.
The Grimclaw super bunker is the most dangerous ground target in the game, protected by layered armor and a point-defense system that shoots down homing missiles. You must rely on your charged plasma cannon for damage, timing your shots between its autocannon sweeps while managing the fighter pressure that always accompanies this encounter. The Grimclaw gunship ace combines the mobility of a fighter with the firepower of a gunship, and it requires a hit-and-run approach that punishes overcommitment. These elite units appear in the final missions and on higher difficulties, and they represent the ultimate test of everything the game teaches you.
| Elite Unit | Unique Trait | Weakness | Counter-Strategy |
|---|---|---|---|
| Fighter Ace | Predictive AI | Overshoot window | Bait and turn |
| Heavy Bomber | Multiple turrets | Engine array | Clear escorts first |
| Super Bunker | Missile defense | Rear shaft | Charged plasma timing |
| Gunship Ace | High mobility | Turn rate | Hit-and-run attacks |
The Grimclaw boss fights represent the culmination of these enemy patterns, combining multiple elite mechanics into single encounters that test your mastery of everything covered here. Each boss has a specific damage phase that requires you to exploit its weak points while managing adds and environmental hazards, and the boss guide provides a comprehensive breakdown of these encounters. Players who have mastered the standard enemy roster will find that boss fights feel like a natural extension of the skills they have already developed, which is a testament to the game's coherent design philosophy.
Frequently Asked Questions
What is the best weapon for dealing with fighter swarms?
The homing missile pod is the best choice for fighter swarms because it locks onto multiple targets simultaneously, letting you thin the herd while focusing on evasion. Fire all four missiles immediately when a swarm appears, then use your standard cannon to clean up any survivors that break through.
How do I dodge the bomber's homing missiles?
Bomber missiles have finite fuel that expires after roughly four seconds of pursuit, so maintaining top speed in a straight line will outrun them. Once the missiles detonate, circle back to punish the bomber while it reloads its launchers. Never try to out-turn these missiles, as they have superior tracking.
Are ground emplacements worth clearing before air units?
Yes, clearing ground emplacements first creates safe zones that make dogfighting significantly easier. The flak turrets and missile batteries create threat zones that limit your movement options, so removing them first gives you the freedom to maneuver against fighters and bombers without worrying about ground fire.
What is the best way to approach the armored bunker?
The armored bunker's frontal plating deflects standard shots, so you must target the rear ventilation shaft. Circle wide to bait the autocannon sweep, then dive under the reload window and hit the shaft with a charged plasma cannon shot. This requires patience, but it is the only reliable way to destroy these emplacements.
How does the scoring system reward aggressive play?
The scoring system rewards aggressive play through a combo multiplier that increases with consecutive kills and resets when you take damage. Clearing waves without a hit grants a perfect wave bonus, while precision shots and minimal damage taken further boost your score. Maintaining your combo while avoiding hits is key to dramatically higher scores.